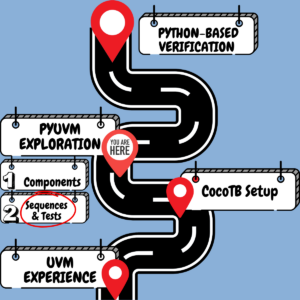
In Part 1, we explored the fundamental components of pyUVM and how they compare to traditional SystemVerilog UVM. We covered transactions, drivers, monitors, coverage, and scoreboards – the building blocks of any verification environment.
In Part 2, we’ll dive deeper into the test execution flow and advanced features that make pyUVM a powerful alternative to SystemVerilog UVM. We’ll focus on:
- Test Classes and Test Execution
- Sequences and Sequence Libraries
- Randomization Strategies
- Parallel Execution with Python Coroutines
- Factory Overrides in pyUVM
- Practical Examples and Best Practices
TL;DR: My findings in a table
| Component | SV/UVM | pyUVM | Key Differences |
| Test Classes | Uses macros like uvm_test_utils for registration | Uses Python decorators @pyuvm.test() and inheritance | Cleaner test declaration with decorators. docstrings replace comment-based documentation. no need for explicit registration. |
| Error Injection | Requires custom infrastructure or factory overrides | Uses configuration database and Python functions | More flexible error injection. Python’s dynamic typing enables runtime error scenario configuration. |
| Resource Usage | Requires full EDA licenses. high memory footprint | Works with open-source / lighter simulator versions lower memory usage | Reduced license requirements. shorter queue times.Potential for better overall throughput despite slower raw execution |
| Debug Visibility | Direct access to waveforms from testbench. Can trace internal verification components | Limited visibility into testbench signals. Primarily monitors DUT interface points | SV/UVM allows debugging of verification components in waveform viewer. pyUVM requires Python debugging approaches for testbench issues |
Let’s continue our exploration using the TinyALU example from Part 1…
1. Test Classes and Test Execution
In SystemVerilog UVM, tests are classes that extend uvm_test and are registered with the factory. In pyUVM, the approach is similar but with Python’s cleaner syntax and the use of decorators.
Test Class Definition
@pyuvm.test()
class AluTest(uvm_test):
    """Test ALU with random and max values"""

    def build_phase(self):
        self.env = AluEnv("env", self)

    def end_of_elaboration_phase(self):
        self.test_all = TestAllSeq.create("test_all")

    async def run_phase(self):
        self.raise_objection()
        await self.test_all.start()
        self.drop_objection()
Key Differences from SystemVerilog UVM:
- Python Decorators: The
@pyuvm.test()decorator replaces UVM macros likeuvm_component_utils(AluTest)and automatically registers the test with the factory. - Documentation Strings: Python’s built-in docstrings provide a clean way to document test functionality directly in the code.
- Phases in pyUVM: The UVM phases are similar but implemented with Python methods instead of virtual methods with macros.
- Objection Mechanism: The objection mechanism works similarly to SystemVerilog UVM but with a cleaner syntax (
self.raise_objection()vs.phase.raise_objection(this)). - Test Selection: Unlike SystemVerilog’s runtime +UVM_TESTNAME argument, pyUVM uses the Python decorators to identify and select tests.
Running Tests
Unlike SystemVerilog UVM, which requires special commands and arguments to run specific tests, pyUVM offers multiple flexible ways to run tests:
1. Using a Makefile
For those familiar with SystemVerilog UVM’s makefile approach, you can create a similar workflow with cocotb’s Makefile facilities:
# Makefile
SIM ?= icarus
TOPLEVEL_LANG ?= verilog

VERILOG_SOURCES += $(PWD)/my_design.sv
# use VHDL_SOURCES for VHDL files

# TOPLEVEL is the name of the toplevel module in your Verilog or VHDL file
TOPLEVEL = my_design

# MODULE is the basename of the Python test file
MODULE = test_my_design

# include cocotb's make rules to take care of the simulator setup
include $(shell cocotb-config --makefiles)/Makefile.sim
With this Makefile, you can run tests using:
# Run the default test
$ make

# Change the simulator
$ make SIM=questa

# Run with wave dumping
$ make WAVES=1
2. Using a Test Runner
For more programmatic control, you can create a Python test runner script:
# test_runner.py
import os
import sys
from pathlib import Path

from cocotb.runner import get_runner


def test_my_design_runner():
    # Use Icarus Verilog as the simulator
    sim = os.getenv("SIM", "icarus")

    # Get project path
    proj_path = Path(__file__).resolve().parent

    # Create sim_build directory if it doesn't exist
    sim_build_dir = proj_path / "sim_build"
    sim_build_dir.mkdir(exist_ok=True)

    # Source files
    sources = [
        proj_path / "hdl" / "verilog" / "tinyalu.sv"
    ]

    # Create runner
    runner = get_runner(sim)

    # Set environment variables to control waveform dumping
    os.environ["COCOTB_DUMP_WAVE_FORMAT"] = "fst"  # Use FST format
    os.environ["IVERILOG_DUMPER"] = "fst"          # Tell Icarus to use FST dumper

    # Build the simulation
    runner.build(
        sources=sources,
        hdl_toplevel="tinyalu",
        waves=True  # This tells cocotb to generate the wave dumping module
    )

    # Run the test with FST format
    runner.test(
        hdl_toplevel="tinyalu",
        test_module="testbench",
        plusargs=["-fst"]  # Use FST format for waves
    )


if __name__ == "__main__":
    test_my_design_runner()
I’ve added here a -fst plusarg for the icarus simulator. I like having the wave file generated by default. In the future, when I will try running regressions, I will make my test_runner scripts more parametric.
Run it with:
# Execute the test runner
$ python test_runner.py

# Set environment variables to configure the run
$ python test_runner.py
Each approach has advantages:
- Makefile: Familiar for hardware engineers transitioning from UVM
- Test Runner: Offers programmatic control and can be integrated into larger Python applications
The simulator will put the waveform file inside “sim_build” directory. I open the fst file using gtkwave.
2. Sequences and Sequence Libraries
Sequences in UVM are responsible for generating stimulus. In pyUVM, sequences are implemented as Python coroutine functions with async/await syntax, making them more readable and maintainable.

Basic Sequence Structure
class RandomSeq(uvm_sequence):
    async def body(self):
        for op in list(Ops):
            cmd_tr = AluSeqItem("cmd_tr", None, None, op)
            await self.start_item(cmd_tr)
            cmd_tr.randomize_operands()
            await self.finish_item(cmd_tr)
Sequence Libraries in pyUVM
In SystemVerilog UVM, sequence libraries use registration macros. In pyUVM, we can create sequence libraries using more Pythonic approaches:
class OpSeq(uvm_sequence):
    def __init__(self, name, aa, bb, op):
        super().__init__(name)
        self.aa = aa
        self.bb = bb
        self.op = Ops(op)

    async def body(self):
        seq_item = AluSeqItem("seq_item", self.aa, self.bb, self.op)
        await self.start_item(seq_item)
        await self.finish_item(seq_item)
        self.result = seq_item.result
3. Randomization Strategies
SystemVerilog UVM uses constraint-based randomization. In pyUVM, we use Python’s random module and custom methods for randomization.
Basic Randomization in pyUVM
def randomize_operands(self):
    self.A = random.randint(0, 255)
    self.B = random.randint(0, 255)

def randomize(self):
    self.randomize_operands()
    self.op = random.choice(list(Ops))
Advanced Randomization with Python Libraries
For more complex constraint solving, you can leverage Python libraries like:
# Using numpy for weighted randomization
import numpy as np

def randomize_weighted(self):
    weights = [0.5, 0.2, 0.2, 0.1]  # Weights for ADD, AND, XOR, MUL
    self.op = np.random.choice(list(Ops), p=weights)
Or for constraint-based randomization similar to SystemVerilog:
# Using the 'constraint' library
from constraint import *

def randomize_constrained(self):
    problem = Problem()
    problem.addVariable("A", range(0, 256))
    problem.addVariable("B", range(0, 256))

    # Add a constraint: A must be greater than B
    problem.addConstraint(lambda a, b: a > b, ["A", "B"])

    solution = problem.getSolution()
    self.A = solution["A"]
    self.B = solution["B"]
Key Differences from SystemVerilog UVM:
- Library-Based vs. Built-In: Python requires external libraries for complex constraints, while SystemVerilog has built-in constraint solving.
- More Control: Python gives you more control over the randomization process.
- Less Syntax: No need for constraint blocks and special syntax.
4. Parallel Execution with Python Coroutines
SystemVerilog UVM uses fork-join for parallel execution. pyUVM leverages Python’s async/await syntax and Cocotb’s coroutine library for parallelism.
Sequential Execution
class TestAllSeq(uvm_sequence):
    async def body(self):
        seqr = ConfigDB().get(None, "", "SEQR")
        random = RandomSeq("random")
        max = MaxSeq("max")
        await random.start(seqr)
        await max.start(seqr)
Parallel Execution
class TestAllForkSeq(uvm_sequence):
    async def body(self):
        seqr = ConfigDB().get(None, "", "SEQR")
        random = RandomSeq("random")
        max = MaxSeq("max")
        random_task = cocotb.start_soon(random.start(seqr))
        max_task = cocotb.start_soon(max.start(seqr))
        await Combine(Join(random_task), Join(max_task))
Key Differences from SystemVerilog UVM:
- Coroutines vs. Fork-Join: Python uses coroutines while SystemVerilog uses fork-join.
- Simple Task Management:
cocotb.start_soon()instead of complex fork-join syntax. - Joining Tasks: Cleaner syntax for waiting for tasks to complete with
await Combine(Join()). - No Race Conditions: Better handling of race conditions with Python’s async model.
5. Factory Overrides in pyUVM
Factory overrides allow for flexible test configuration without modifying base code. In SystemVerilog UVM, this is done through set_type_override methods. pyUVM follows a similar approach:
Factory Override Example
@pyuvm.test()
class ParallelTest(AluTest):
    """Test ALU random and max forked"""

    def build_phase(self):
        uvm_factory().set_type_override_by_type(TestAllSeq, TestAllForkSeq)
        super().build_phase()
Configuration Database
In addition to factory overrides, pyUVM uses a configuration database similar to SystemVerilog UVM:
@pyuvm.test()
class FibonacciTest(AluTest):
    """Run Fibonacci program"""

    def build_phase(self):
        ConfigDB().set(None, "*", "DISABLE_COVERAGE_ERRORS", True)
        uvm_factory().set_type_override_by_type(TestAllSeq, FibonacciSeq)
        return super().build_phase()
Error Injection
You can use the configuration database for error injection as well:
@pyuvm.test(expect_fail=True)
class AluTestErrors(AluTest):
    """Test ALU with errors on all operations"""

    def start_of_simulation_phase(self):
        ConfigDB().set(None, "*", "CREATE_ERRORS", True)
Key Differences from SystemVerilog UVM:
- Simpler Override Syntax: Cleaner syntax for factory overrides.
- Python Inheritance: Leverages Python’s inheritance model for test extension.
- Test Annotations: The
expect_fail=Trueannotation provides metadata about test expectations. - Config Database: Simpler configuration database interface without templates.
6. Practical Examples and Best Practices
Let’s wrap up with some practical examples and best practices for pyUVM.
Example: A Complex Test Scenario
The Fibonacci test is a great example of how pyUVM can implement complex algorithms:
class FibonacciSeq(uvm_sequence):
    def __init__(self, name):
        super().__init__(name)
        self.seqr = ConfigDB().get(None, "", "SEQR")

    async def body(self):
        prev_num = 0
        cur_num = 1
        fib_list = [prev_num, cur_num]
        for _ in range(7):
            sum = await do_add(self.seqr, prev_num, cur_num)
            fib_list.append(sum)
            prev_num = cur_num
            cur_num = sum
        uvm_root().logger.info("Fibonacci Sequence: " + str(fib_list))
        uvm_root().set_logging_level_hier(CRITICAL)
Best Practices
With Python, it’s very easy to integrate to new IDE, tool or library. you just need to follow some rules:
- Consistent Naming Conventions: Follow Python PEP 8 naming conventions for consistency.
- Documentation: Use docstrings liberally to document your classes and methods.
- Testing the Test: Use Python’s built-in testing frameworks to test your verification components.
- Error Handling: Use Python’s exception handling for robust error handling.
- Logging: Leverage Python’s logging system for better debug capabilities.
import logging

# Configure logging
logging.basicConfig(level=logging.INFO)
logger = logging.getLogger("my_verification")

# Use logging in your components
logger.info("Starting test...")
logger.debug("Detailed debug information")
logger.warning("Something might be wrong")
logger.error("Something is definitely wrong")- Environment Variables: Use environment variables for configuration instead of command-line arguments.
import os

# Get configuration from environment variables
sim_time = int(os.getenv("SIM_TIME", "1000"))- Test Organization: Organize tests into separate files using Python modules.
Advanced pyUVM Features I’m going to check
- Python Data Analysis: Integrate with Python data analysis tools for test result analysis.
- GUI Integration: Use Python GUI libraries for visualization of test results.
- Running Regressions: Bringing it all together to run parametric regressions where testcases and number of runs change. possibly with help of a GUI.
- Remote Debugging: One of the most intriguing possibilities with Python-based verification. I need to investigate setting breakpoints, inspecting variables, etc. Not sure yet about the ability to stop the simulator when python stops at breakpoints.
- Machine Learning Integration: Using Python’s ML libraries to optimize test generation, predict coverage gaps, or identify patterns in failing tests. This will come after mastering test_runner scripts.
Conclusion
pyUVM offers a powerful alternative to SystemVerilog UVM with the following advantages:
- Simplicity: Cleaner syntax and less boilerplate code.
- Flexibility: Easier to extend and customize.
- Integration: Access to Python’s vast ecosystem of libraries.
- Learnability: Easier to learn for those familiar with Python.
- Portability: Runs anywhere Python runs, not tied to specific simulators.
- Resource Efficiency: Python tests typically don’t spend as much time in EDA tool queues as SV/UVM tests do in modern environments, potentially improving overall verification throughput despite per-test performance differences.
When considering trade-offs:
- Raw Execution Speed: Individual tests may run slower than compiled SystemVerilog for large designs, but this is often offset by shorter queue times and better resource utilization.
- Industry Adoption: Not as widely adopted as SystemVerilog UVM, though gaining popularity.
- Tooling: Less mature tooling and IDE support, though Python’s general-purpose tools can often fill the gaps.

In the end, choosing between SystemVerilog UVM and pyUVM depends on your specific needs and environment. If you value simplicity, flexibility, and access to Python’s ecosystem, pyUVM may be the right choice for your verification needs. In modern EDA environments with limited license availability and queue contention, the reduced resource requirements of Python-based verification can also provide significant practical advantages in overall verification throughput.
References
- pyUVM Documentation
- Cocotb Documentation
- Python coroutines and async documentation
- Python random module documentation
- Constraint Programming with Python
- Too much Reddit to attach here – Contact for more 😉


