What is Cocotb?
Cocotb (COroutine based COsimulation TestBench) is an open-source Python framework for verifying VHDL and Verilog designs. Unlike traditional verification approaches that require writing testbenches in HDL, Cocotb allows you to write tests in Python, making verification more productive and less error-prone. or so they say 🙂
Why Consider Python-Based Verification?
As a UVM practitioner, I’ve been intrigued by the growing interest in Python-based verification. Here’s what motivated me to explore this approach:
- Python Power: Access Python’s rich ecosystem of libraries and tools (ML, data analysis, etc.)
- More Gentle Learning Curve: Potentially easier to train new team members (compared to UVM)
- No HDL Compilation: Your testbench doesn’t need to be compiled
- Familiar Structure: PyUVM brings UVM concepts to Python (which we’ll explore in the next post)
Prerequisites
Before starting, make sure you have:
- Python 3.6+ installed
- A Verilog/VHDL simulator (we’ll use Icarus Verilog)
- Basic knowledge of Python and hardware design
Setup
1. Install a Simulator
For this tutorial, we’ll use Icarus Verilog, a free and open-source Verilog simulator.
sudo apt-get install iverilog2. Create a Python Virtual Environment
# Create a new directory for the project
mkdir cocotb_learn
cd cocotb_learn

# Create a virtual environment
python -m venv .

# Activate the virtual environment
source bin/activate
Your command prompt should now show the name of your virtual environment, indicating it’s active.
3. Install Cocotb
With your virtual environment activated, install CocoTB using pip:
pip install cocotbYour First Cocotb Project
I’ve used the files from the quickstart section of CocoTB here. found also in the project’s github.
1. Design Under Test (DUT):
my_design.sv is the Verilog module we’ll be testing:
// This file is public domain, it can be freely copied without restrictions.
// SPDX-License-Identifier: CC0-1.0

module my_design(input logic clk);

  timeunit 1ns;
  timeprecision 1ns;

  logic my_signal_1;
  logic my_signal_2;

  assign my_signal_1 = 1'bx;
  assign my_signal_2 = 0;

endmodule
2.Test File:
The Python file test_my_design.py contains our test:
# This file is public domain, it can be freely copied without restrictions.
# SPDX-License-Identifier: CC0-1.0

import cocotb
from cocotb.triggers import Timer


@cocotb.test()
async def my_first_test(dut):
    """Try accessing the design."""

    for cycle in range(10):
        dut.clk.value = 0
        await Timer(1, units="ns")
        dut.clk.value = 1
        await Timer(1, units="ns")

    dut._log.info("my_signal_1 is %s", dut.my_signal_1.value)
    assert dut.my_signal_2.value[0] == 0, "my_signal_2[0] is not 0!"


# Extended version with better clock generation
import cocotb
from cocotb.triggers import FallingEdge, Timer


async def generate_clock(dut):
    """Generate clock pulses."""

    for cycle in range(10):
        dut.clk.value = 0
        await Timer(1, units="ns")
        dut.clk.value = 1
        await Timer(1, units="ns")


@cocotb.test()
async def my_second_test(dut):
    """Try accessing the design."""

    await cocotb.start(generate_clock(dut))  # run the clock "in the background"

    await Timer(5, units="ns")  # wait a bit
    await FallingEdge(dut.clk)  # wait for falling edge/"negedge"

    dut._log.info("my_signal_1 is %s", dut.my_signal_1.value)
    assert dut.my_signal_2.value[0] == 0, "my_signal_2[0] is not 0!"
3. Test Runner:
the test_runner.py file provides an alternative way to run tests:
# This file is public domain, it can be freely copied without restrictions.
# SPDX-License-Identifier: CC0-1.0

import os
from pathlib import Path

from cocotb.runner import get_runner


def test_my_design_runner():
    sim = os.getenv("SIM", "icarus")

    proj_path = Path(__file__).resolve().parent

    sources = [proj_path / "my_design.sv"]

    runner = get_runner(sim)
    runner.build(
        sources=sources,
        hdl_toplevel="my_design",
    )

    runner.test(hdl_toplevel="my_design", test_module="test_my_design,")


if __name__ == "__main__":
    test_my_design_runner()
4. Makefile
This Makefile configures the simulation:
# This file is public domain, it can be freely copied without restrictions.
# SPDX-License-Identifier: CC0-1.0

# defaults
SIM ?= icarus
TOPLEVEL_LANG ?= verilog

VERILOG_SOURCES += $(PWD)/my_design.sv
# use VHDL_SOURCES for VHDL files

# TOPLEVEL is the name of the toplevel module in your Verilog or VHDL file
TOPLEVEL = my_design

# MODULE is the basename of the Python test file
MODULE = test_my_design

# include cocotb's make rules to take care of the simulator setup
include $(shell cocotb-config --makefiles)/Makefile.sim
Running the Simulation
With your virtual environment activated, run the simulation using make:
makeUnderstanding the Output
After running the simulation, you should see output similar to:
Running 2 tests using /usr/bin/python3
test_my_design.my_first_test ... my_signal_1 is x
                                 ok
test_my_design.my_second_test ... my_signal_1 is x
                                  ok
Cocotb has also generated several files:
results.xml: Test results in JUnit formatsim_build/: Directory containing simulation files*.vcd: Waveform files for viewing with tools like GTKWave

What Just Happened?
Let’s break down what happened:
- The Makefile set up the simulation environment
- Icarus Verilog compiled our design
- Cocotb loaded the compiled design and executed our Python tests
- Each test:
- Generated clock signals
- Waited for specific conditions
- Accessed signals in our design
- Made assertions about signal values
How Cocotb Works: The Technical Details
Coming from UVM, it’s important to understand how Cocotb actually interfaces with HDL simulators. Cocotb uses standard simulator interfaces to access and manipulate your design:
The VPI/VHPI/FLI Connection
Cocotb interfaces with simulators through standard Application Programming Interfaces (APIs):
- VPI (Verilog Procedural Interface) – For Verilog/SystemVerilog simulators
- VHPI (VHDL Procedural Interface) – For VHDL simulators
- FLI (Foreign Language Interface) – For some VHDL simulators
When you run a Cocotb test, it:
- Compiles your design using your chosen simulator (like Icarus Verilog)
- Loads a simulator-specific shared library (e.g.,
libcocotbvpi_icarus.so) that connects Python to the simulator - Starts the simulator with your compiled design
- Uses the VPI/VHPI/FLI API to access signals, set values, and control simulation time
This approach means Python code can:
Read and write any signal in your design hierarchy and control simulation time advancement. It can also react to events in the simulation.
Unlike SystemVerilog DPI (Direct Programming Interface), which requires writing C/C++ code or wrappers of some kind and recompiling for each change, Cocotb’s Python layer provides dynamic interaction without recompilation.
The GPI Layer – or Abstraction, API and Portability
Cocotb abstracts these simulator interfaces through its Generic Programming Interface (GPI), which provides a consistent API regardless of which simulator you’re using. This makes your testbenches portable across simulators. We like portability 🙂

This architecture is one of the key differences from SystemVerilog UVM, where the testbench is compiled together with the design. In Cocotb, the Python environment runs alongside the simulator and communicates with it through these standardized interfaces.
Key Cocotb Concepts
1. DUT Handle
As I understand, the first argument to every test function is the DUT (Design Under Test) handle, which lets you access signals in your design:
dut.my_signal_1.value  # Read a signal
dut.clk.value = 1      # Write to a signal
The DUT handle gives you complete access to any signal in your design hierarchy, including internal signals that might be difficult to access in traditional verification approaches.
2. Coroutines and Async/Await
Cocotb uses Python’s async/await syntax for controlling simulation time:
await Timer(1, units="ns") # Wait for 1ns of simulation time3. Triggers
Triggers tell the simulator when to resume your test:
Edge(signal): Wait for any edgeTimer(time, units): Wait for simulation timeRisingEdge(signal): Wait for rising edgeFallingEdge(signal): Wait for falling edge
4. Starting Concurrent Functions
You can start functions to run concurrently:
await cocotb.start(generate_clock(dut))Next Steps
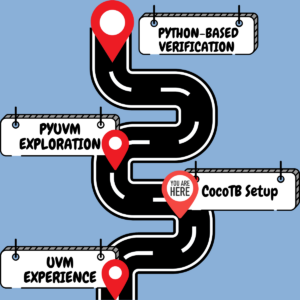
Now that we’ve set up Cocotb and run our first test, the next post will explore PyUVM. I’ll investigate how it compares to traditional SystemVerilog UVM, looking at:
- Structure and implementation of UVM components
- Performance and scalability considerations
- Practical examples showing when Python-based verification might (or might not) be advantageous
Stay tuned as I continue this exploration into whether Python-based verification is truly the way forward for hardware verification.

Thanks for this blog on cocotb. I am looking forward to the next posts
Thanks, it will be published soon 🙂
Thanks to this blog, I was able to set up the cocotb environment and gain basic understanding of cocotb-based verification.
Good job, be sure to follow the next parts as we delve into pyUVM…